VoiceMeeter Potato
Audio Theory for Streamers
Ok, welcome back to my small blog!
Today we'll start directly with the BEAST of virtual audio Mixers : VoiceMeeter Potato!!!
AIM OF THIS TUTORIAL: having all audio sources (music,voice chat, game..) separated into OBS Mixer and gain complete control of your audio system.
Introduction take directly from their site:
Voicemeeter Potato is the ultimate version of our Audio Mixer Application endowed with Virtual Audio Device to mix and manage any audio sources from or to any audio devices or applications.
WHAT IS A MIXER?
in easy terms is a piece of hardware where you'll connect all your instruments/mics/sound sources
and it will sum and send to an output.-
so the easy scheme is:

in theory you can have infinite inputs as well infinite outputs... crazy eh?
the "chain of sound" is:
device output-cable-input mixer-output mixer-cable-input speaker
(this will be useful for future reference)
But let's talk about our Mixer!!!
First of all you need the Tools to work with:
DOWNLOAD Audio Mixer
DOWNLOAD Virtual Cables
once downloaded and installed (these are donationware, no activation cost, but you can buy a licence for the products... and for what this programs offers... is priceless!)
when you run it, don't be afraid!

5 hardware input
3 software input
5 hardware output
3 software output
every stripe is filled with sliders,knobs,controls... aaaaaaaarrgghhhh!
confingurtion
STEP1: think about all your audio source in your setup (hardware and software).
in my setup I have:
- headset Microphone (HW)
- Blue yeti Mic (main) (HW)
- music (spotify/pretzel music) (SW)
- Discord (or any other voice chat) (SW)
- Game Audio (SW)
1a. go to windows audio setup and select VAIO3 Input as default Playback

1b. go to windows audio setup and select your mic as default Record

get back to MIXER and move to upper right corner:

You'll have A1...A5 drop down menus where to choose your outputs
for example : A1 = headset A2=speakers A3=hdmi monitor and so on
use A1 for your main /preferred output device! ACTIVATE under VAIO3 strip the toggle button A1
this will route the sound from "VAIO3" to "A1" exit
DONE! if you play something (youtube/spotify etc) you should be able to ear something!
NOTE: if crackling sound try to choose a different audio driver from the dropdown list!
now it's time to add some INPUTS!

you can choose for each strip the device to connect
the mixer should find any of your audio input device connected to you PC.-
as before you've to choose the driver option where is no crakles or distorsion!
select your main MIC and activate A1 toggle.- you can now test the configuartion.-
VERY IMPORTANT NOTE if you monitor the mic audio be careful with Larsen effect! NEVER use mic and speakers as monitor!!! will do nasty noises!!!
VIRTUAL OUTPUT CHANNELS
each hardware input strip has 3 "B" output channels these are the key to integrate the mixer into OBS!

each "B" button has his output strip at the far right of the mixer:
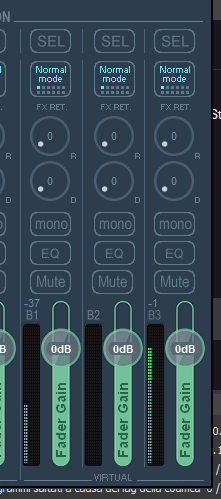
those outs follows the same logic of the Virtual Inputs:
from Left to right : VAIO - AUX - VAIO3
going now to OBS settings then to Audio tab:

you'll define "Audio desktop" as your VAIO3 input of the mixer (where all "other audio goes")
"audio desktop 2" as CABLE-D (or whatever cable you want) will become GAME AUDIO
then in auxiliary OBS audio channels you can put:
VAIO output (will be used for the MIC)
AUX VAIO output (will be used for voice chat)
VAIO3 output (will be used for Music)
you'll should have a similar screen (I'v just renamed the audio strips with familiar names):

we're missing : VOICE CHAT and GAME AUDIO
VOICE CHAT
just head to your chat software (I use Discord) and simply change the IN and OUT

IN= your preferred MIC
OUT= VOICEMEETER AUX INPUT
and it's DONE!
GAME AUDIO
some game has built-in settings to route the audio to different devices (example Diablo3)
some other no.
if the game has built-in option simply choose the cable you've used before (in our example CABLE-D) and as we've already set the whole routing it simply works!
for the games that didn't has this option you should go to windows advanced audio settings with the application running

find the game needed to be routed and choose the correct pre config.cable (our case CABLE-D INput)

and as we've already configured OBS your game audio is now ready.-
NOW you've completed all the settings to dominate your stream audio!!!
everything now SHOULD work good and smooth... if not write me on: TWITTER - FB - TWITCH
here you can download my mixer settings: VOICEMEETER_SETTINGS_ONEF
PS reccomeand to buy the licence as is donationware with something like 25USD you'll have every piece of software!!!


Commenti
Posta un commento